Dragon Frame is a professional software used for capturing and arranging frames of animation, it’s been used on many of the animatons we saw in class and on many major motion pictures. Much like Premiere there is a lot that can be done with this program that we won’t have time to cover in this class.
As always if you have any questions don’t hesitate to get in touch.
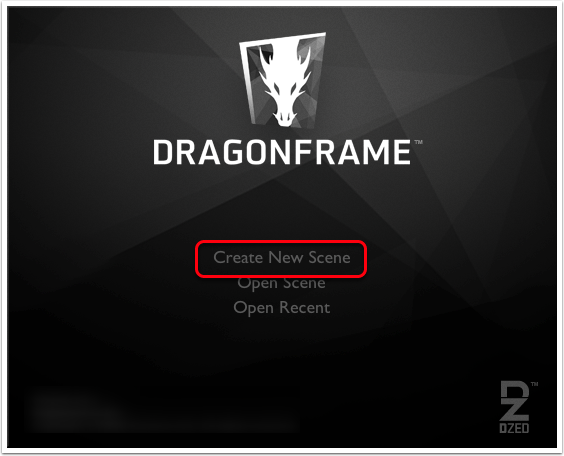
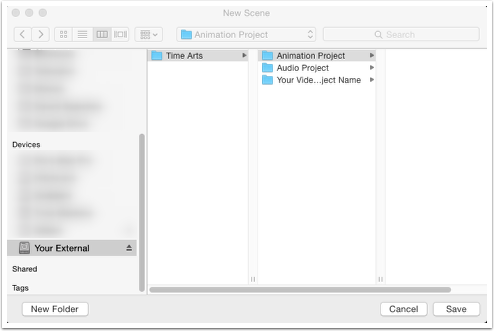
Select ‘Create New Scene’
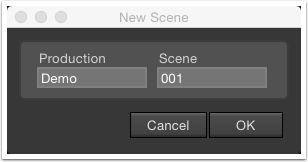
Give your pictures a name scheme
Note you can only use up to 5 characters for the ‘Production’ section.
Save your project in a folder your created specifically for it. Here I used ‘Animation Project’.
Set up your camera
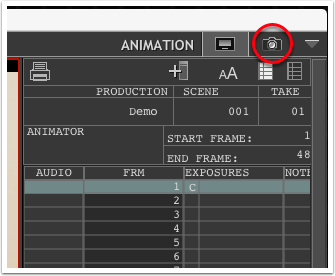
The first time you open DragonFrame it can be a little intimidating, don’t worry a lot of the icons and buttons are for things we won’t worry about in this class. Before you start animating go into CINEMATOGRAPHY mode by pressing the small camera icon in the upper right corner of the screen.
Adjust your camera in CINEMATOGRAPHY mode
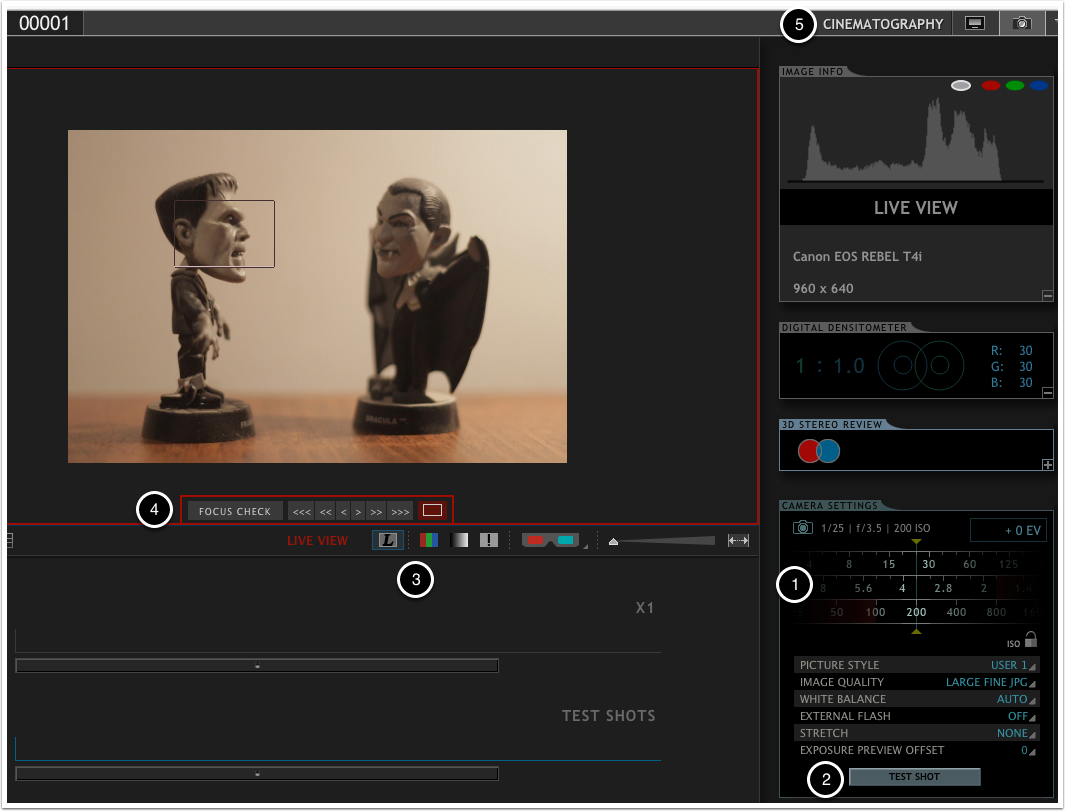
- First make sure your focus and exposure is correct. If the color seems off you might need to adjust the white balance. NOTE: all of these adjustments can be made in DragonFrame.
- Once everything is set take a test shot; often focus might be a little different with the actual frame than what you see in live view.
- Once the test shot is taken you can switch between Live View (the ‘L’) button and other views of the Test Shot using the buttons below the preview image.
- Press the ‘Focus Check’ button to enlarge a section of your scene and check to make sure the focus is sharp.
- When everything looks good switch over to the ANIMATION view by pressing the button that looks like a small computer next to the CINEMATOGRAPHY button.
Intro to the Keypad
The Keypad or Remote that comes with DragonFrame allows you easy access to the most common events when recording your animation. Below is a list of the most important keys for your project.
- Delete the current frame.
- Loop the animation.
- Reduce onion skin effect.
- Toggle Live View on and off.
- Increase onion skin effect.
- Go back a frame.
- Go forward a frame.
- Go to the end of the animation.
- Record a frame.
- Play the animation.

Controlling the onion skin effect
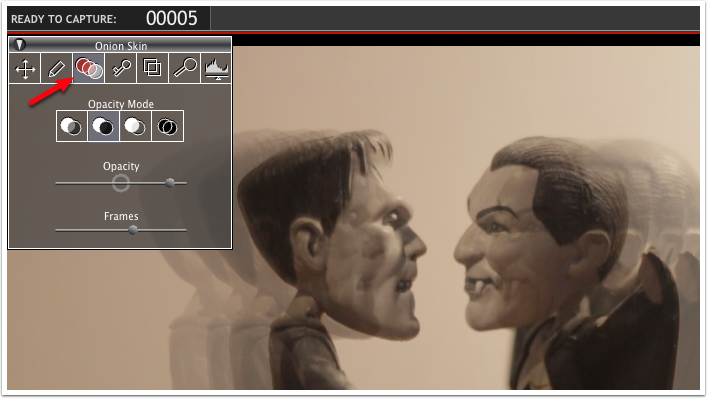
Onion skinning allows you to see some of the previous frames of your animation to help with placement and timing. The onion skin preference is available in the tools pallet which will appear for a few seconds if you mouse over the preview window. Pressing the icon which looks like three circles will bring up more options.
- Opacity Mode will let you chose how the different frames are blended, much like blend modes in Photoshop.
- The Opacity slider controls the amont of opacity.
- The Frames slider allows you to chose how many frames to show in the onion skin effect.
The playback bar
- These controls allow you to flip and rotate your image as well as toggle title safe and grid mode on and off.
- The Timeline button will toggle the timeline on and off.
- The x-sheet button will toggle the x-sheet on and off.
- The mask button will allow you to mask the animation to a specific aspect ratio.
- The onion skin opacity slider will adjust how visible the onion skin is over the camera’s Live view.
- The loop button will turn loop playback on and off.
- You can adjust the frames per second of your animation here. Remember more frames will equal a smother animation.

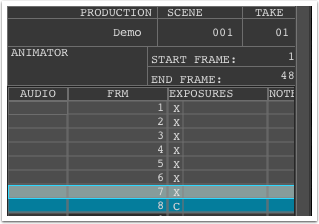
The X-Sheet
The X-Sheet allows you to see what frame you are on and to add notes to help in timing.
Exporting your animation
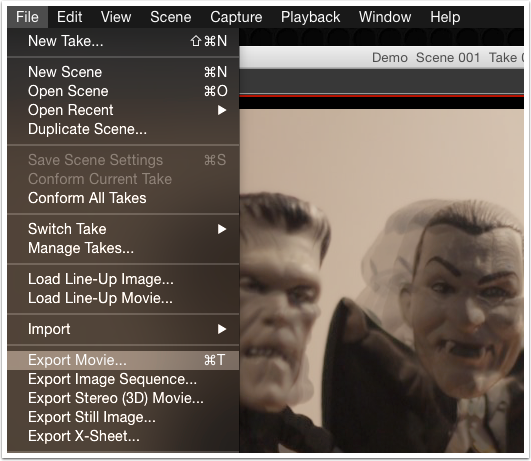
To export your animation go to File > Export Movie or press COMMAND and T.
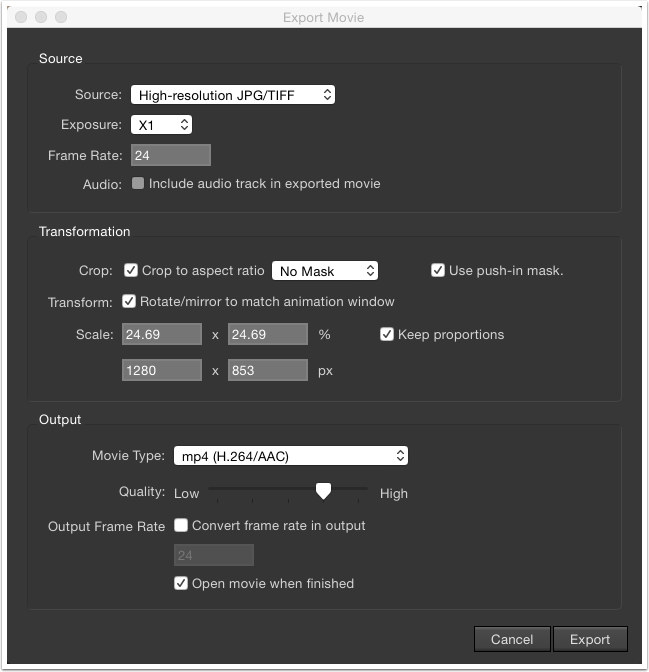
Most of the default settings should be fine, click the ‘Export’ button.
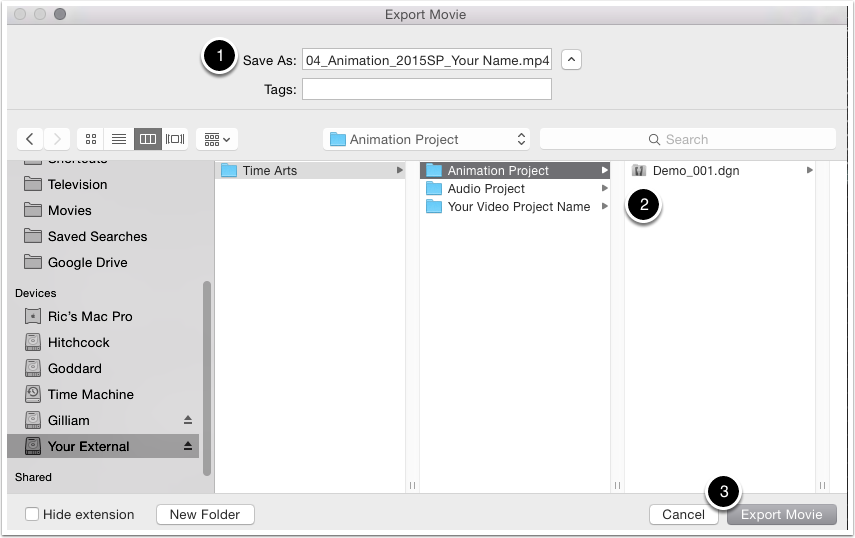
Name and save your movie.
- Name your movie with the proper naming convention – 04_Animation_YEAR_TERM_Your_Name.
- Navigate to your Animation Project folder on your external drive.
- Click the ‘Export Movie’ button.
