The Premiere Tools
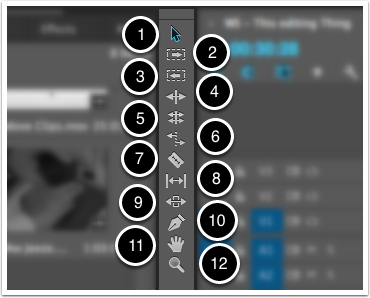
- **Selection Tool — V — **This tool will allow you to select and move a single clip.
- Track Select Forward Tool — A — This tool will select the current clip and all clips to the right of that clip, it’s handy for making space for an additional clip.
- **Track Select Backward Tool — SHIFT A — **This tool will select the current clip and all clips to the left of that clip, it’s handy for making space for an additional clip.
- Ripple Edit Tool — B — This tool works on an edit point (the place where two clips meet) if you drag to the left or the right of an edit point a blank space will be created or part of the adjoining clip will be written over. The Ripple Edit Tool will close the gap or push the rest of the edits forward.
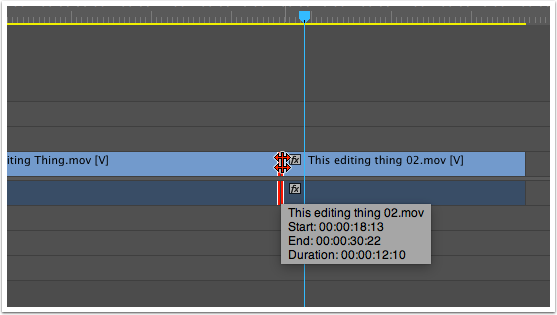
- Rolling Edit Tool — N — This tool also works on an edit point but it will simply allow you to move where the point occurs and will not change the durration of the piece. This tool is helpful to fine tune match on action edits.
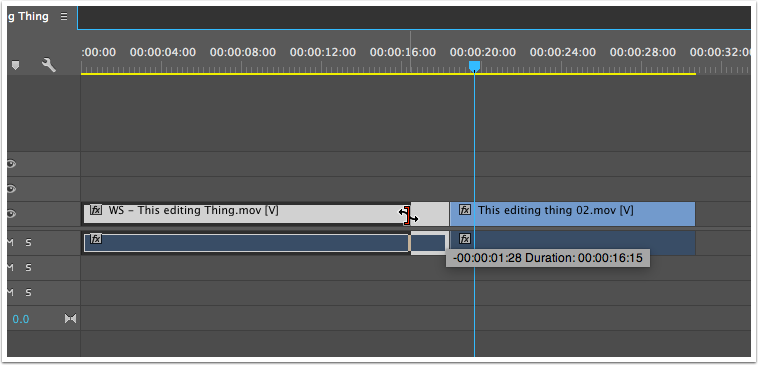
- Rate Stretch Tool — R — This tool is used to shorten or lengthen a clip in the Timeline. The Rate Stretch tool speeds up or slows down the playback of the clip without trimming the clip, thus leaving the In and Out points of the clip unchanged.
- Razor Tool — C — Use this tool to split clips in the Timeline. Click any point on a clip to split it at that exact location. To split all clips across all tracks at an exact point, press and hold the Shift key while clicking a clip.
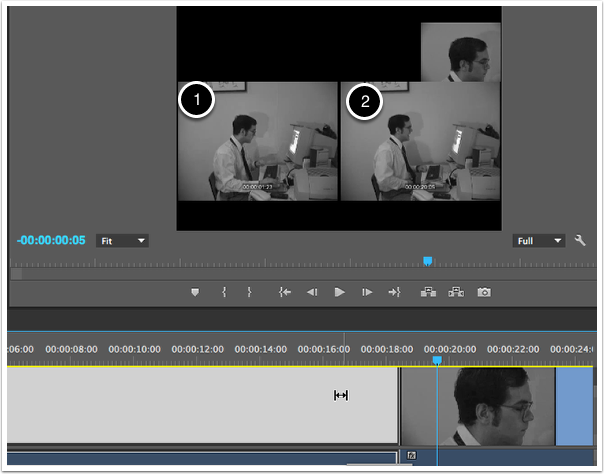
- Slip Tool — Y — Use the Slip tool to simultaneously change the In and Out points of a clip in a Timeline, while keeping the overall duration of the clip unchanged.
- Slide Tool — U — Use this tool to move a clip to the right or left on the Timeline while trimming any adjacent clips. The combined duration of the clips, and the location of the group in the Timeline, remain unchanged.
- Pen Tool — P — All clips have a set of inherent properties that you can animate using the Effect Controls panel. Select the Pen tool to set or select key frames for clips in the Timeline.
- Hand Tool — H — Use this tool to move the viewing area of a Timeline to the right or left as an alternative to the scroll bar at the base of the Timeline panel.
- Zoom Tool — Z — Select this tool to zoom in or out in the Timeline viewing area.
Using the Ripple Edit Tool
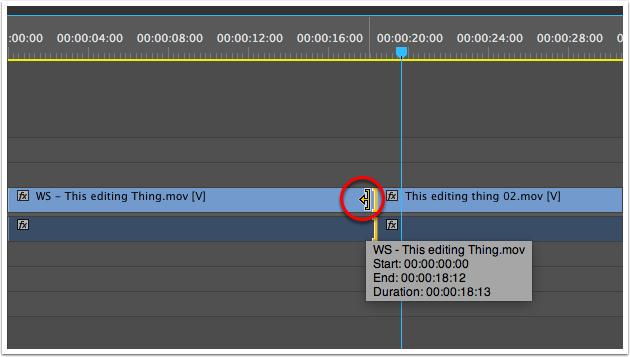
- When using the Ripple Edit Tool the direction the yellow arrow is pointed shows which clip is going to be affected
- Use the OPTION key and the LEFT or RIGHT arrows to add or subtract one frame at a time.
Using the Rolling Edit Tool
- Click on edit point you want to modify.
- Use the OPTION key and the LEFT or RIGHT arrows to move the cut one frame at a time.
Using the Rate Stretch Tool
Click on the edit point and sliding left or right will slow down or increase the speed of the clip. In this picture the clip has been sped up by 1 second and 28 frames.
Using the Slip Tool
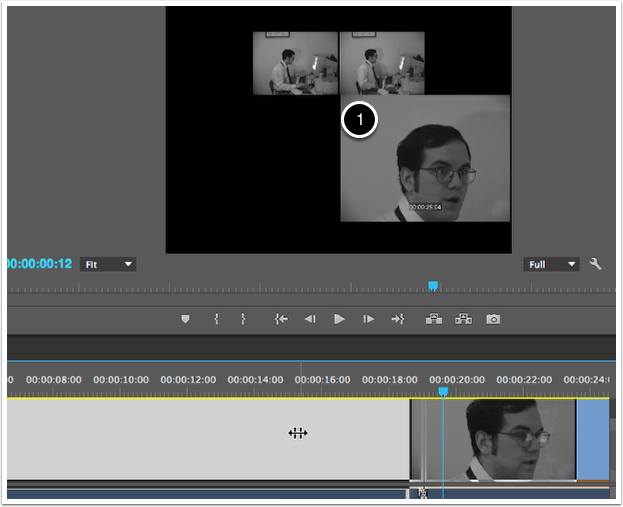
When using the slip tool the Timeline View Window will show the new In point (1) and Out point (2).
Using the Slide Tool
The Timeline viewer shows the first frame of the clip after the edit has been slid (1).
